Friday, September 28, 2012

Pogo Seat Adjustment

Last time I took my panhead up to the mountains, I had problems with the seat bottoming out when riding through the twisties and hitting bumps.  Now that I've added auxiliary lights under the seat, I'm more concerned about bottoming out.  Before I buy a set of stiffer springs, I thought I would try tightening the current springs to see what difference that makes.

To tighten the springs, you first have to remove the seat post assembly.  Pull the seat pin and flip the seat forward to get it out of the way.  Then look under the bike and find the 7/8" nut that holds the bottom of the assembly in place.  It's called the post clamp nut.


Remove the nut and use a rubber mallet to tap the end of the seat post assembly up through the seat post tube.  Once the assembly is loose, pull it straight up out of the frame tube.


Now you'll have a greasy seat post assembly, ready to adjust.  Make sure you have a spot ready on your bench where you can set it down and not get grease all over the place.


At the lower end of the assembly there are four different nuts for either making adjustments or locking them in place.


To tighten the springs, you'll need to adjust the 7/8" nut that is up against the springs.  Use a 9/16" wrench to hold the shaft steady with the lower lock nut.  Having a thin 7/8" wrench will make this part much easier.


 Once the adjustments are finished, tighten down the lock nuts and reinstall the assembly.  Make sure to note that there is a flat side on the lower rod nut that fits into a flat spot on the bottom of the seat post frame tube.  This keeps the entire assembly from twisting, so it's important to make sure it is seated correctly in the frame.  The last steps are to tighten the seat post clamp nut, fold down the seat and pop the seat pin back in.  

I'll post the results of the adjustments when I return from the road run next week.  

Wednesday, September 26, 2012

How to "Spot" a Panhead

With my upcoming trip to the mountains of NC for the AMCA Southern Coalition National Road Run, I decided it was time to figure out how to mount my Spot Satellite GPS Messenger.  I'll write up a more detailed review of the Spot after I've used it, but basically it is a hand-held satellite tracking device.


I picked up a standard RAM mount which is designed for mounting the Spot to your handlebars, although I had no plans on putting it on my handlebars.  It's a panhead not a BMW...


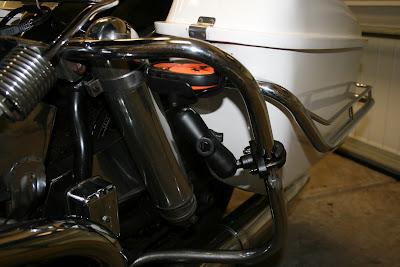
I figured the best place to mount the Spot was somewhere towards the center of the bike where there wouldn't be too much heat from the motor and a less vibrations from the road.  I finally decided on mounting it to the rear crash bars.  This positioned the Spot just in front of my left saddlebag, but put it low enough that I could still open the lid to the saddlebag.  It also doesn't stick out so much...

Installing the RAM mount only takes about 5 minutes.  I just tightened the two lock nuts on the base with a 7/16" wrench to attach it to the rear crash bar.  Then I positioned the Spot and tightened the center thumb screw to hold it in place.  That's it.


Monday, September 24, 2012

Ray Price Capital City Bikefest

Ray Price Harley-Davidson hosted the 8th annual Capital City Bikefest last weekend.  This was an all weekend event, starting at noon on Friday and continuing all the way to 5:00 on Sunday afternoon.  The festivities were divided between Ray Price's dealership in Raleigh and a four block section of downtown which was closed to car traffic.

I rode out to the dealership first, since I really wasn't sure what part of downtown was hosting the main portion of the event.  Arriving at the dealership, I was pleased to see that there were a lot of bikes and snagged a good parking spot right out front.


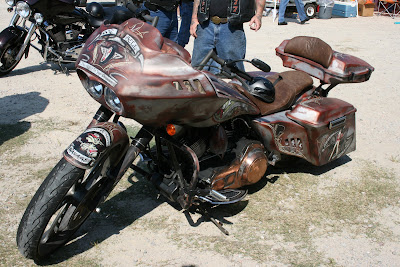
As usual, the front parking lot had a few vendors, but for this event they also had vendors in a secondary parking lot behind the dealership.  A quick look around yielded a few vintage bikes mixed into the sea of baggers.  I also snapped some pictures of a couple coontails, just for fun.


Next stop was downtown and a ton more bikes.  By noon on Saturday, bikes had already been parked up and down both sides of the street and they were starting to line them up down the center of the street.  I pulled up right in front of the Full Throttle tent and the editor Mark Infield had his custom servi-car parked right out front.


After talking old bikes with Mark, I headed down to the bike show.  Along the way, I ran across a motorcycle high wire act.


The bike show had the usual collection of chrome laden bikes, but there was an antique class which had about half a dozen entries.


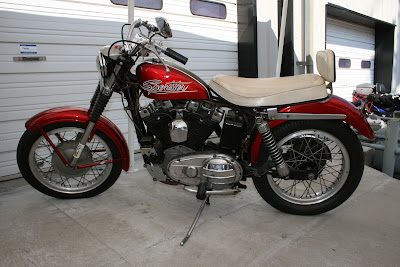
Vintage bikes showed up here and there as I walked around, so I grabbed some shots.


Thursday, September 20, 2012

Ortlieb Flight Pack


Almost five years ago, I was looking for a solution for carrying my laptop back and forth to work on my motorcycle.  I needed something that was waterproof and would keep the laptop more secure than just packing it in a saddlebag.  A backpack seemed like it would be the best option and after a quick web search I realized that there weren't that many waterproof backpacks that would be suitable for wearing on a motorcycle.  Then while flipping through a copy of Aerostich's catalog, I spotted the Ortlieb Flight Pack.

It looked like it would do the trick, so I ordered one up.  When it arrived I put it right into service and it performed perfectly for the next four years.  The waterproof TZIP zippers kept everything dry, even in a downpour.  The pack held plenty of gear, but still was comfortable to wear.  Everything was going great until a couple months ago.  Then all the seams decided to start giving way.  Take a look...


Luckily, Ortlieb has a five year warranty, so this backpack is headed back to the factory for a refurbish or if I'm lucky a complete replacement.

Wednesday, September 19, 2012

Pin-Up Art


Now that I've got your attention, here's a project that can make use of all those ride and event pins that you've been collecting over the years.  

First you'll need to pick up a map of the country or continent that you do most of your riding in.  I live in the United States, so I picked up a map from National Geographic.  Make sure you pick one that has all the major roads and highways.  

Next step is to get it dry mounted.  I chose to go with a piece of 1/4" thick GatorBoard, which is a rigid foam core board.  Not all frame shops carry it, but it is worth calling a couple shops to find one that does because GatorBoard is less likely to bend or warp over time.

Now you need to assemble all your pins, a couple Sharpie markers, graph paper, craft glue and some stick pins.


Using the Sharpie's, trace out all your ride routes on the map.  You can use stick pins to denote places of interest or stop and starting points.  Then arrange all your pins.  I laid a piece of graph paper on top of the map and lined it up with the nearest edge.  This gives you a grid to keep your pins square and evenly spaced.  Once the holes are marked for the pins, remove the graph paper and use a dab of craft glue to hold each pin in place.  


After the glue is dried, you can hang it as is or have it framed.  I had mine framed and hung it on the wall in my shop.  

Wednesday, September 12, 2012

W.F.M.C Super Deluxe Mini-Ratchet Tool Set


I first got my hands on a mini-ratchet set from Wadsworth Falls Manufacturing Co. back at the 2011 Kickstart Classic Motorcycle Ride.  At a gas stop, I noticed that one of the bolts had rattled out of a fellow rider's tappet block on his panhead.  Luckily the bolt was laying right behind the tappet block by the timer.  Unluckily, it was the back bolt which is tough to reach.  I asked if anyone had a really small ratchet with a phillips head driver.  Before I knew it, someone was handing me a little red box with a mini-ratchet plus a variety of bits.  The mini-ratchet made quick work of reinstalling the bolt and I was impressed by the workmanship that went into this pocket sized tool set.  

When I returned from the ride, I ordered a mini-ratchet tool set for myself.  I chose the 52 piece "Super Deluxe" set which came with the most bits and tools.  Here's what they are able to fit in 2-15/16” wide x 1 3/8” high x 4-7/8” long box:

Four tools


  • Super- Mini ratchet L, (4-9/16" long),WF-71
  • Screwdriver Handle
  • Extension 4-9/16", WF-70
  • Bit End Cap


  • Three 12-Bit Caddies with 44 Bits


  • 12 - hex bits: .050",1/16", 5/64", 3/32", 7/64", 1/8", 9/64", 5/32", 3/16", 7/32", 1/4", 5/16"
  • 8 -Metric Hex Bits: 1.5mm ,2mm, 2.5mm ,3mm ,4mm ,5mm, 6mm, 8mm
  • 9- slotted bits: #,0,#1, #2, #3,#4, #5, #8, #10, 1/4"
  • 5 - Phillips: P0, P1, P2, P3, P4
  • 1 - Reed + Prince
  • 8 - “6 spline” bits: T9, T10, T15, T20, T25, T27, T30, T40
  • 1- 1/4" Socket Adapter


  • The mini-ratchet has a short 12 degree arc for working on sensitive jobs that need a delicate "feel".  It also has the strength to produce 400-inch lbs. of torque when you need it.  The tool set is made in the USA with a lifetime warranty and can be picked up online for around $75.  Since space is a premium on a motorcycle, having a compact tool kit that can handle so many different jobs is a definite advantage.  I keep mine in my windshield bag, so it is easy to reach when I need it.

    Tuesday, September 11, 2012

    AMCA Southern Coalition National Road Run


    Basic Schedule

    Sunday, September 30th - 12 noon - 5 P.M. - Check in at Wheels Through Time - you must check in during that time to have a picture of you and your bike taken for a presentation item that will be given out at the banquet. Pick up your registration packet, meet your fellow riders, etc.
    Chase truck will leave out Monday - Wednesday morning at 9:30.  You should leave prior.
    Orientation dinner on Sunday night.
    Cook-out Tuesday night.
    Banquet Wednesday night.

    We'll be riding the Dragon, Cherohala Parkway, Blue Ridge Parkway and other beautiful mountain roads.
    The rides on Monday and Tuesday are about 200 miles, Wednesday is on the Blue Ridge Parkway to Mt. Pisgah which round trip is about 100 miles but you can of course continue on to Mt. Mitchell.

    Sunday, September 9, 2012

    Auxiliary Rear Lighting - Wiring

    Besides adding more light to the rear of my bike, I wanted this upgrade to look "period correct", so there were a couple extra steps that I needed to take in order to make the lights look like they were installed in 1964 and not 2012.

    First thing to go was the modern style wire coming out of each of the light sockets.  I had a couple pieces of cloth covered wire stashed in my parts drawer and that served as the basis for my new pigtails.

    In order to rebuild the sockets, I first disassembled them completely.


    Crimped on the end of each wire pigtail was a small brass terminal contact.  This can be uncrimped and reused, but I recommend ordering a new terminal contact that can be soldered on to the end of the wire.  I ordered mine from The Repair Connector Store.  To install the new terminal contact, I first filled the terminal contact with solder.  This was accomplished by heating it with the tip of a soldering iron and then adding soldering wire until the cup was filled.


    Next I stripped the wire and used the soldering iron to tin the exposed wire.


    To complete the job, I reheated the terminal contact and pushed the wire into it.  Once the wire cooled, I reassembled the pigtail and added a little heat shrink to keep the cloth covering from fraying.


    I repeated the process for the other pigtail and then reassembled both fixtures.


    With the fixtures properly rewired, I remounted them on the angle brackets under the seat.  I then used black cloth friction tape to hold the wires in place as I routed them toward the gas tank, making sure to leave a loop for the removal of the seat pin.


    I had a short length of asbestos loom in my parts drawer and used it to cover the wire as it went from the T-bar to in between the gas tanks.


    I chose to run the wire to the dash switch instead of the terminal block under the seat because it allowed me to still flip the seat up without needing to detach the lights or to have a long loop of wire hanging under the seat.  Running the wire between the tanks and into the back of the dash took a lot of careful "fishing" and probably would have been faster if I had just removed the dash completely.

    The wire came through on the left side of the dash (yellow arrow below) and then attached to the #4  terminal on the switch (blue arrow below).  Note this is on a 1964 Duo-Glide.  


    Once all the wiring was in place, I bolted the seat back on.  


    Here's how the new lights look in the dark.